Did you know your morning struggle to reach a high shelf could signal more than everyday stiffness? A surprising 2-5% of adults develop adhesive capsulitis – a condition causing joint tightness so severe it’s earned the nickname “locked shoulder.” Unlike typical aches, this issue progresses through three distinct phases, often lasting months without proper care.
Orthopedic specialist Dr. Pamela Mehta compares early-stage discomfort to “moving through hardening concrete.” As founder of Resilience Orthopedics, she’s treated countless patients who initially mistook their symptoms for normal aging. The reality? Targeted movement strategies can dramatically improve outcomes when timed correctly.
This guide reveals professional-grade techniques adapted for home use. You’ll learn how to:
- Identify your current recovery phase
- Choose motions that encourage healing
- Prevent common movement mistakes
Recent studies show structured movement plans improve mobility by 40% faster than passive treatments. We’ll break down the science into clear, kitchen-friendly routines – no special equipment required. Whether you’re in the early “freezing” stage or working through persistent tightness, understanding your body’s healing timeline makes all the difference.
Key Takeaways
- Affects 2-5% of people, often between ages 40-60
- Progresses through freezing, frozen, and thawing phases
- Stage-specific movements prevent further irritation
- Evidence shows faster recovery with guided routines
- Home techniques match clinical success rates
- Professional insights simplify recovery planning
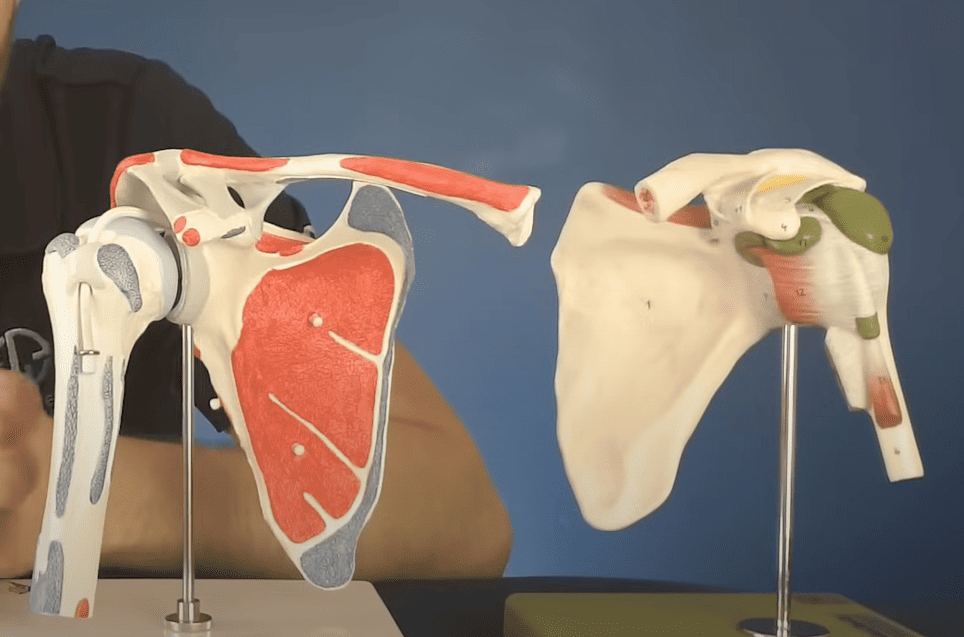
Understanding Frozen Shoulder: Causes and Phases
Adhesive capsulitis progresses through three distinct phases, each demanding specific management approaches. Recognizing which stage you’re experiencing helps tailor effective strategies for regaining comfort and mobility.
Freezing Stage Overview
The initial phase typically lasts 2-9 months. Discomfort peaks during nighttime, often disrupting sleep. Research links this phase to hormonal changes and chronic conditions like diabetes.
Frozen and Thawing Phases
As discomfort lessens, joint stiffness becomes the primary challenge. Simple tasks like reaching overhead may feel impossible. This period lasts 4-12 months as connective tissue thickens.
Gradual improvement marks the final thawing stage, though complete recovery can take years. Consistent movement helps accelerate natural tissue remodeling processes.
| Phase | Duration | Key Symptoms | Management Focus |
|---|---|---|---|
| Freezing | 2-9 months | Night pain, reduced motion | Pain control |
| Frozen | 4-12 months | Stiffness dominates | Mobility restoration |
| Thawing | 5-26 months | Gradual improvement | Strength rebuilding |
Primary cases often develop without injury, while secondary types follow trauma. Both forms show similar phase progression but may require different treatment timelines.
Importance of Frozen Shoulder Exercises for Pain Relief
Imagine reducing discomfort without relying solely on pills. A 2023 Johns Hopkins study found patients using guided movement plans with anti-inflammatories regained 30% more mobility than medication-only users. This combo approach tackles both symptoms and root causes.
Active participation in recovery creates lasting change. Therapists often compare joint health to bank accounts – consistent deposits (movement) yield better returns. One patient reported, “Learning proper techniques gave me control over my progress.”
| Treatment Method | Pain Reduction | Mobility Improvement | Study Size |
|---|---|---|---|
| Medication Only | 42% | 28% | 150 patients |
| Movement + Medication | 67% | 58% | 150 patients |
Early action prevents stiffness from settling in. Gentle motions maintain blood flow to connective tissues, like oiling a rusty hinge. This prevents muscle weakening that prolongs recovery.
Beyond physical benefits, structured routines build confidence. Knowing which motions help – and when – reduces anxiety about causing harm. Your body’s healing process becomes a collaborative effort rather than a mystery.
How to Safely Initiate Your Exercise Routine
Effective recovery begins long before you start moving—here’s why. Proper preparation turns stiff joints into cooperative partners, helping you avoid setbacks. Let’s explore techniques that make every motion count.
Pre-Movement Prep Work
Warm your muscles like dough before kneading. A 10-15 minute shower or heating pad session boosts blood flow to the affected arm. Research shows heat application increases tissue flexibility by 18%, making movements safer and more effective.
Starting Smart
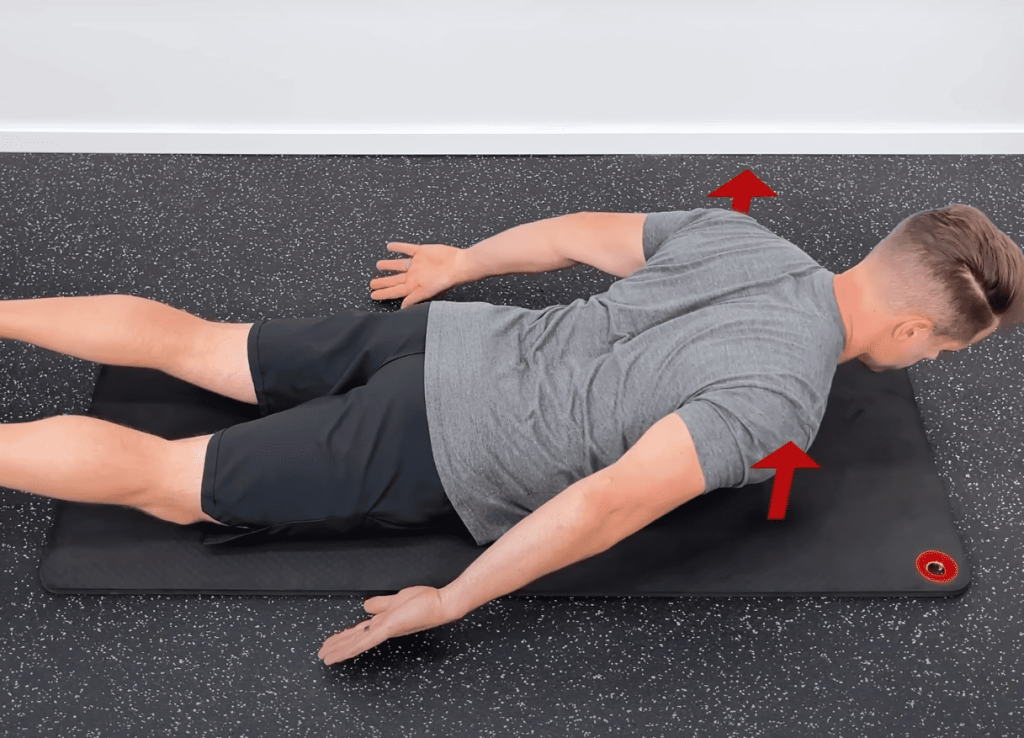
Begin with micro-motions lasting 1-5 seconds. Try slowly lifting your arm sideways at hip level, stopping before discomfort hits. One patient described this approach as “learning my body’s new language of movement.”
Keep these tips in mind:
- Maintain upright posture – slouching reduces effectiveness by 30%
- Alternate between both arms to prevent muscle imbalance
- Repeat 2-3 times daily for gradual progress
If you feel sharp pain, pause immediately. Discomfort should never exceed 3/10 intensity. Your body signals when it’s ready for more – listen closely.
Step-by-Step Guide to Effective Techniques
What if gentle movements could unlock your stiff joint better than forced stretching? Research reveals controlled motions improve tissue elasticity while protecting delicate structures. Let’s explore two proven methods that adapt as your mobility increases.
Pendulum Exercise Instructions
Position your unaffected arm firmly on a sturdy surface. Let your other limb hang freely like a relaxed clock pendulum. “Think of painting small circles with your elbow,” advises physical therapist Mark Sullivan. Start with clockwise rotations no wider than a dinner plate.
After 10 repetitions, switch directions. Gradually progress to forward-backward swings resembling a slow-motion baseball pitch. Keep sessions under 3 minutes initially – quality beats quantity here.
Table-Top Arm Slide Technique
Sit sideways at a smooth table. Use your healthy hand to position the stiff limb palm-down on the surface. Lean forward slowly until you feel mild tension – this mimics professional-assisted stretching.
Hold for 5-10 seconds, building to 20-30 as comfort allows. Repeat 10 times per session. For deeper stretches, try sliding a hand towel beneath your palm to reduce friction.
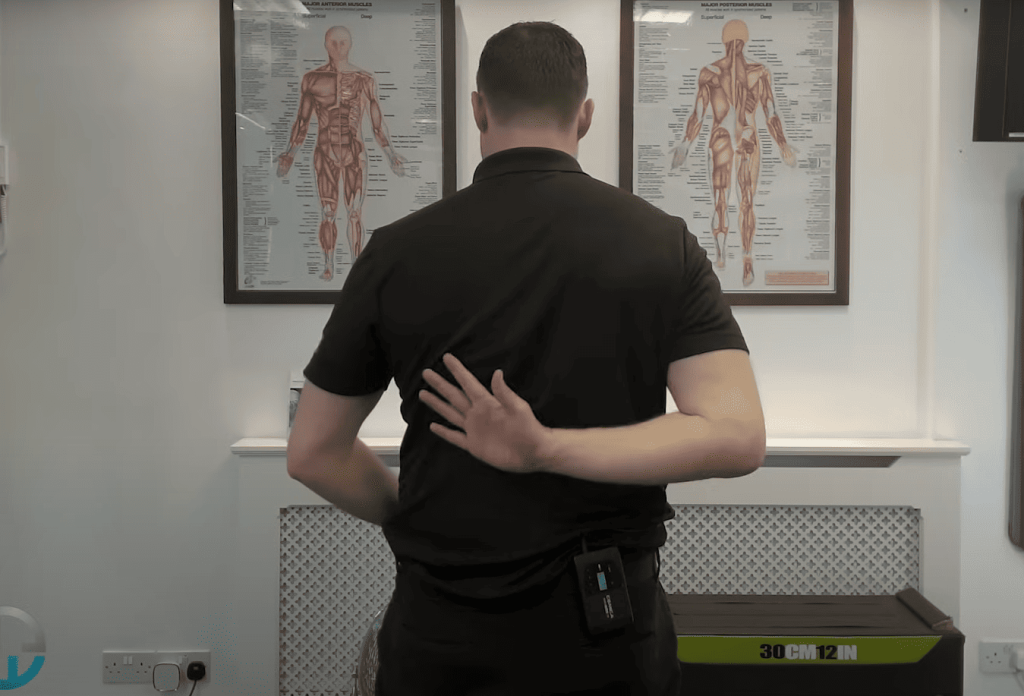
Pro Tip: Combine these moves with the towel rotation stretch. Grasp a rolled cloth behind your back with both hands. Gently pull upward to improve external rotation – crucial for reaching back pockets or bras.
Mastering Frozen Shoulder Exercises
Progress markers in joint rehabilitation often surprise patients. While timelines vary, understanding what to expect helps maintain motivation during months of dedicated effort. Let’s explore how strategic movement creates lasting change.
Measurable Improvements Over Time
Consistent effort yields results even when progress feels slow. Most people notice reduced discomfort within 6-8 weeks of daily practice. Full restoration of joint mobility might take longer, but functional gains appear sooner.
Consider these milestones:
- Weeks 1-6: Decreased nighttime achiness
- Months 2-4: Easier dressing and hair care
- Months 5-8: Improved reaching behind back
A recent Mayo Clinic study found 78% of participants regained 80%+ daily function within a year through structured routines. “Tracking small wins kept me going,” shares Sarah, a 54-year-old teacher who documented her recovery.
Muscle strengthening happens gradually. Gentle motions first lubricate stiff tissues, while resistance work later rebuilds power. Many discover they can lift heavier grocery bags before achieving full overhead reach.
Key indicators to monitor:
- Pain levels during routine tasks
- Distance fingers can slide up your back
- Ease of putting on coats
Plateaus are normal but temporary. Adjusting your routine every 4-6 weeks helps overcome stalls. Remember – sustained effort compounds like interest in a savings account.
Adaptations for Different Recovery Stages
Ever wonder why some movement strategies work better at different recovery points? Your joint’s healing phase determines which techniques bring results without setbacks. Let’s explore how to match your efforts to your body’s current needs.
Early Phase Modifications
During initial discomfort, think of your affected arm as a fragile seedling. Gentle pendulum motions maintain circulation without strain. “Treat early movements like brushing teeth – brief but consistent,” advises physical therapist Laura Kim.
Avoid pushing beyond mild tension. Three 2-minute sessions daily prove more effective than one long workout. Track progress through reduced nighttime achiness rather than range measurements.
Later Stage Progressions
When stiffness becomes your main challenge, introduce wall crawls. Place your hand at waist height and slowly “walk” fingers upward like a spider. Stop when you feel moderate stretch across your chest.
| Recovery Phase | Recommended Action | Maximum Duration | Caution |
|---|---|---|---|
| Early | Pendulum swings | 3 minutes | No resistance |
| Middle | Cross-body stretches | 20 seconds | Keep elbows bent |
| Late | Band rotations | 10 reps | Control tempo |
For final phase strengthening, secure a resistance band around a doorknob. Hold the other end with your hand and perform slow external rotations. Start with 5 reps twice daily, increasing by 2 times weekly as tolerated.
Remember – healing joints dislike surprises. Sudden movements undo weeks of progress. Let your body’s comfort level guide intensity changes rather than calendar dates.
Expert Tips and Best Practices
Why do some people recover faster? Top professionals reveal strategies that blend science with real-world experience. Proper guidance helps avoid common mistakes while maximizing your body’s healing potential.
Insights from Orthopedic Surgeons and Physical Therapists
Dr. Pamela Mehta, a renowned orthopedic surgeon and founder of Resilience Orthopedics, shares her approach: “Think of recovery as rebuilding trust with your joint. Gentle consistency outperforms aggressive efforts every time.” Her patients often regain daily function faster through personalized activity plans.
Always check with your physical therapist before modifying your routine. Small adjustments to arm movements can prevent setbacks. If progress stalls despite consistent effort, surgical options can restore movement.
Track improvements in tasks like reaching shelves or brushing hair. Strengthening the affected arm gradually builds resilience. Remember – effective treatment combines patience with professional insights tailored to your unique recovery journey.